
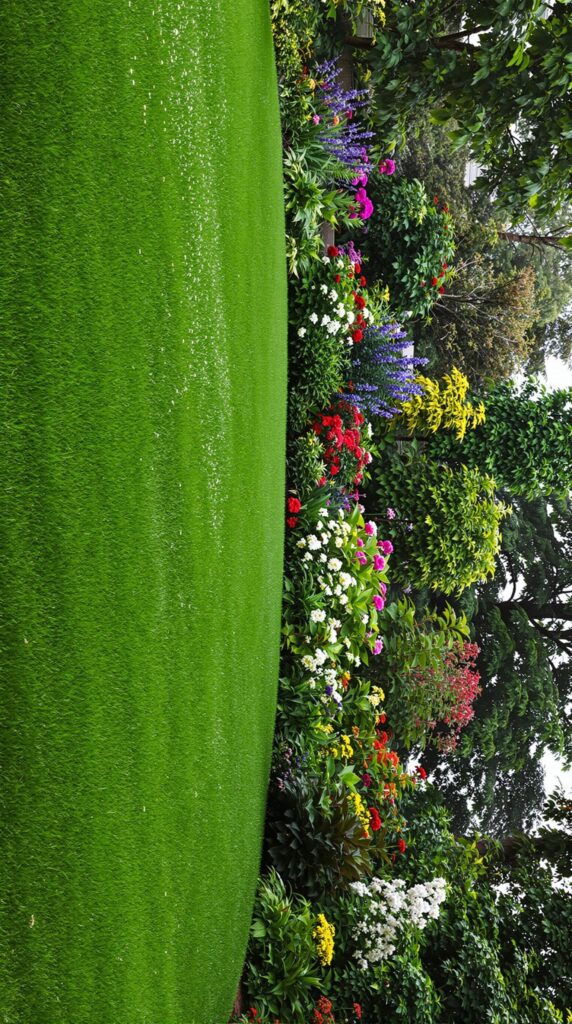
While using Ogrovision (AI Garden), many users upload photos directly from their phones. Unfortunately, we often see cases where images have the wrong orientation — vertical photos appear horizontal, and horizontal ones appear vertical. It may seem trivial, but this issue can disrupt the visualization process.
Example:
At Ogrovision, we’re working on an automatic solution to this issue, but in the meantime we’ve released a manual rotation feature within our editor. This allows users to quickly adjust the orientation of their image and continue working on their garden visualization without interruptions.
How to Rotate a Photo in Ogrovision (AI Garden)?
The new editor feature lets you rotate images easily using dedicated buttons.
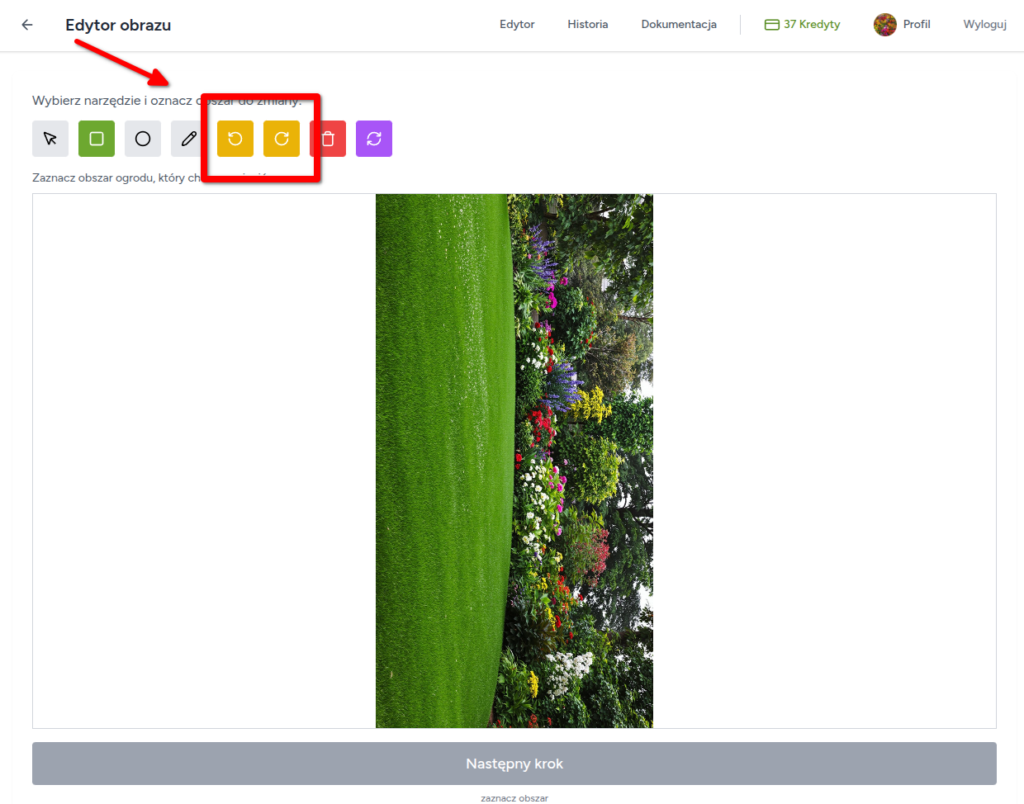
Here’s a step-by-step guide:
- Upload your photo – Add your image to Ogrovision as usual.
- Open the editor – Once uploaded, open the image in the editor.
- Find the rotate buttons – In the toolbar, you’ll find buttons that let you rotate the image 90° left or right.
- Adjust the orientation – Click the appropriate button until the image is correctly aligned.
- Continue your visualization – Once the image is fixed, you can get back to designing your dream garden.
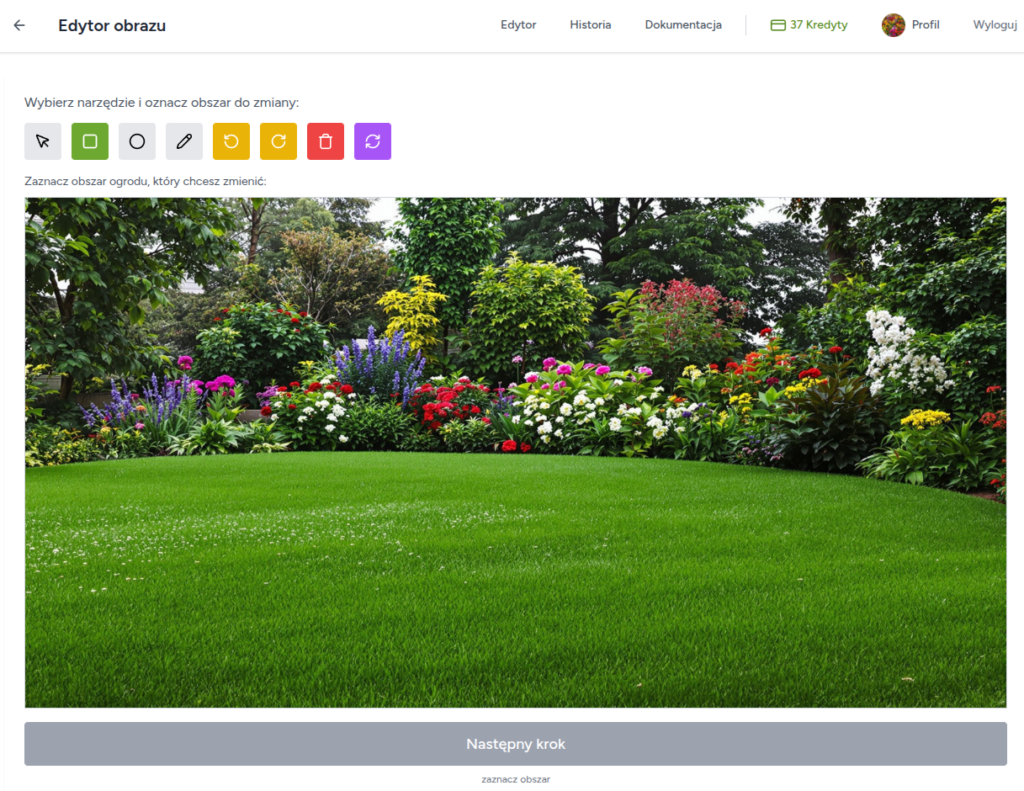
Result:
A Simple Fix for Better Results
Thanks to the new image rotation feature in Ogrovision, users can quickly solve orientation issues and focus on creating their dream garden. If you have any questions or suggestions about the editor, feel free to reach out – we’re constantly improving Ogrovision to make it as intuitive and user-friendly as possible.
Try the new feature today and start creating professional garden visualizations without interruptions!