How to Draw Masks in Ogrovision: A Beginner’s Guide
Karol Orzeł
Masks are one of the most important features in Ogrovision, as they let you define exactly which parts of your photo should be changed by the AI. Think of it like “pointing a finger” at the area you want to modify. Although the concept might sound a bit mysterious at first, it’s actually quite simple: once you highlight a specific region of your image (the mask), Ogrovision knows where to apply the changes. Below, you’ll find an easy-to-follow overview on using masks effectively.
What Are Masks, and Why Use Them?
A “mask” is any section of your photo that you indicate for alteration. Whether you want to add a new row of flowers, adjust the shape of a path, or even modify part of a building, masks help you focus the AI’s attention on the exact spot you want to tweak—without affecting the entire picture. Precise masking keeps the rest of your image intact, preventing unwanted surprises like an AI-generated cloud or a changed house facade when all you wanted was an updated flower bed.
How to Draw Masks in Ogrovision
Ogrovision provides several built-in tools for drawing masks:
Rectangle – Ideal for marking rectangular sections, such as a patch of grass or a portion of a wall.
Circle – Great if you’re dealing with a circular area, like a small flower bed or a pond.
Freehand (Draw) – Perfect for irregular shapes or when you need a more detailed, custom outline around specific elements.
If you make a mistake or want a fresh start, simply hit the red “Clear” button (4) to remove any existing masks. For an even smoother experience, try full-screen mode (5), which makes drawing easier on both mobile devices and computers.
Common Masking Mistakes
Masking the Entire Photo
One of the most frequent errors is selecting the entire image in hopes of getting a “better” result. In reality, this tells the AI to modify everything—including buildings, plants, and even the sky—which rarely matches your vision. Instead, aim to:
Highlight only the specific area you’d like to change.
Keep your selection as accurate as possible—for instance, if you’re adding a flower bed near the patio, mark just the relevant patch of lawn, not the whole garden.
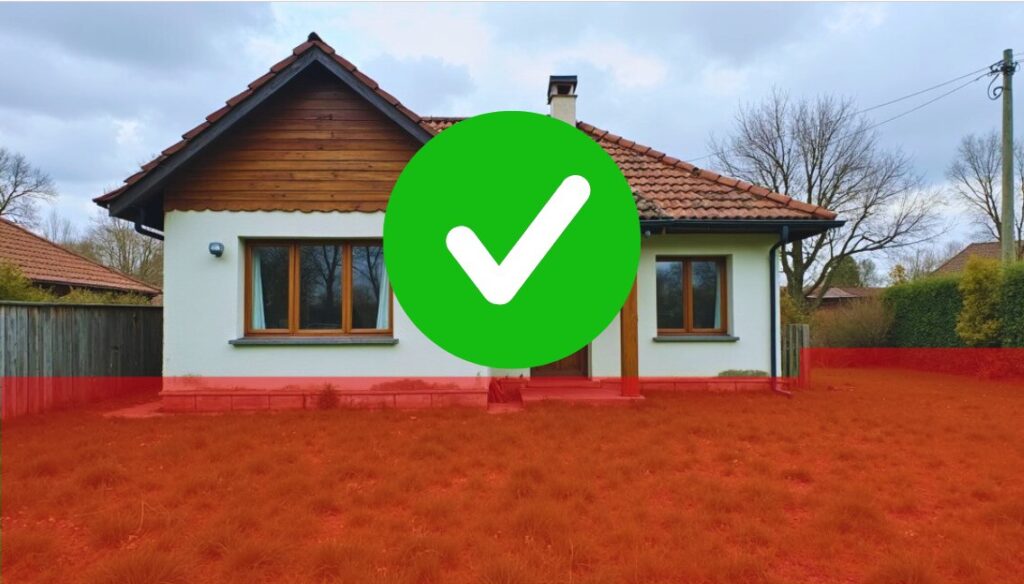
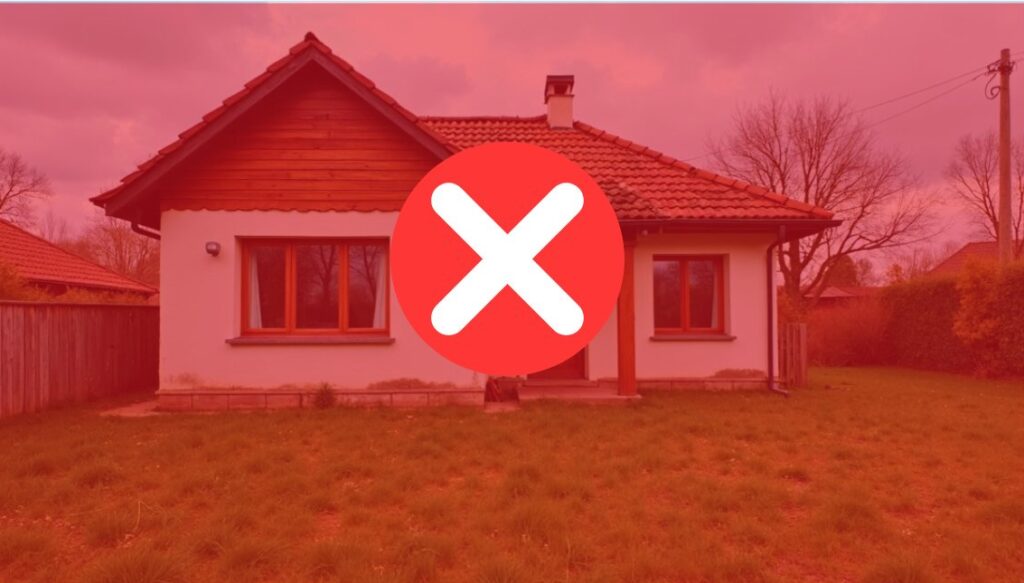
Example:
Good Practice: Precisely outlining the spot where changes should appear.
Poor Practice: Covering the entire photo (house, yard, and sky).
Making the Mask Too Small
The second pitfall is the opposite: picking a region that’s so tiny that the AI lacks the context it needs. If you want a narrow flower bed, a small mask makes sense, but too small of a selection can make it hard for the AI to blend the new features seamlessly. Leave some extra space so the system can “see” enough of the surrounding area to incorporate the changes naturally.
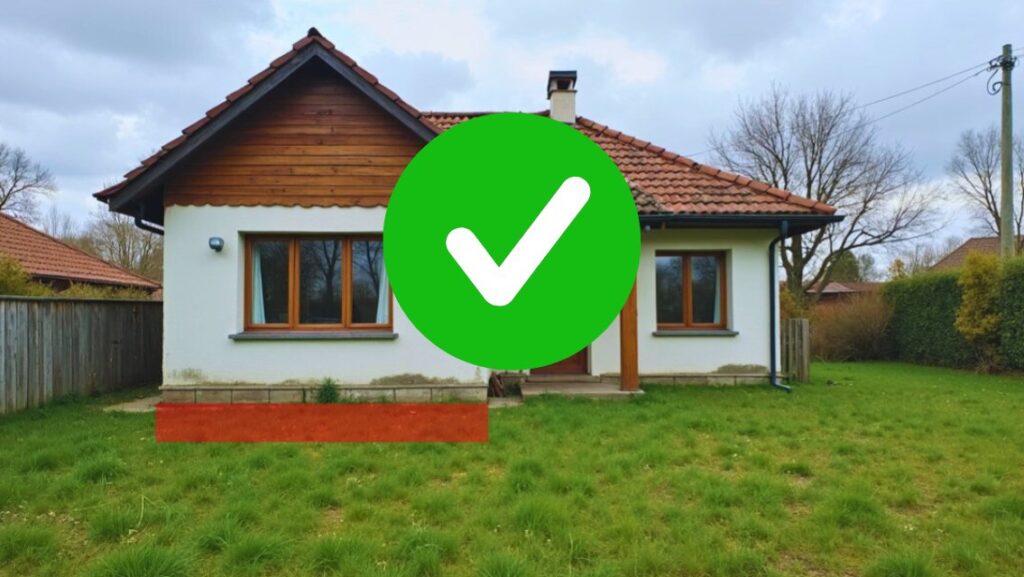
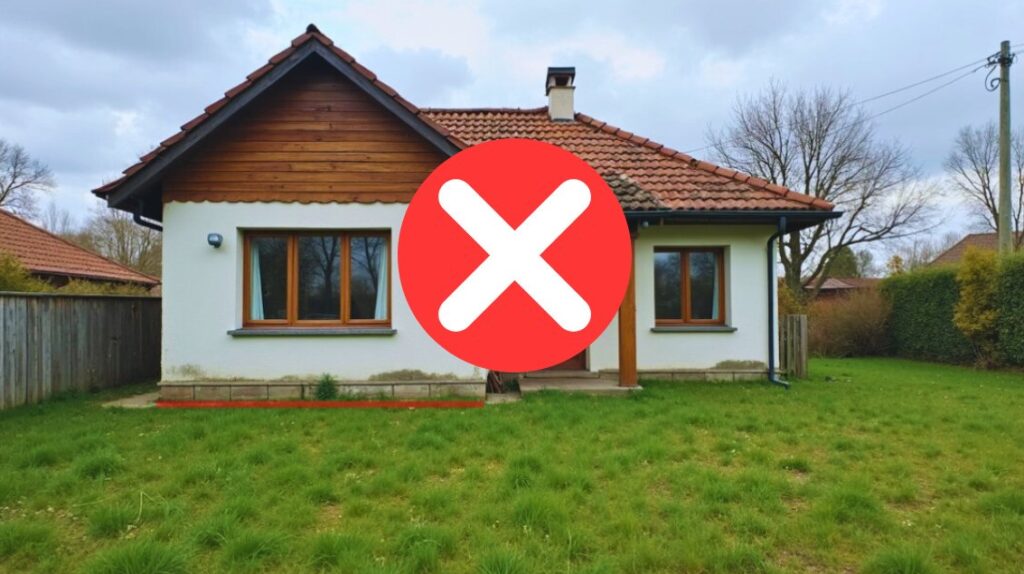
Example:
Good Practice: Highlighting the future flower bed plus a small border, giving the AI a clear sense of the surrounding lawn.
Poor Practice: Creating a mask that’s barely larger than the bed itself, offering almost no context to work with.
Leaving a Margin
No matter if you’re masking a large area or a small one, including a small margin can be very helpful. AI will try to seamlessly integrate the new elements with what’s already in the photo. For instance, if you want your new flower bed to blend into the lawn, include a little extra grass in the mask so the system can properly merge the old and new sections.
Quick Tips for Best Results
Draw masks with care – not too big and not too small.
Choose the right tool – rectangle, circle, or freehand, depending on the shape you need.
Leave a buffer zone – it helps the AI fit your new element smoothly into the original image.
Avoid masking the entire photo – be precise about what you actually want to change.
Use “Clear” if needed – start fresh if something goes wrong.
The more you practice, the easier it gets. With just a little trial and error, you’ll be confidently creating stunning garden designs in Ogrovision. Happy designing!
To provide the best experiences, we use technologies like cookies to store and/or access device information. Consenting to these technologies will allow us to process data such as browsing behavior or unique IDs on this site. Not consenting or withdrawing consent, may adversely affect certain features and functions.
Functional
Always active
The technical storage or access is strictly necessary for the legitimate purpose of enabling the use of a specific service explicitly requested by the subscriber or user, or for the sole purpose of carrying out the transmission of a communication over an electronic communications network.
Preferences
The technical storage or access is necessary for the legitimate purpose of storing preferences that are not requested by the subscriber or user.
Statistics
The technical storage or access that is used exclusively for statistical purposes.Przechowywanie techniczne lub dostęp, który jest używany wyłącznie do anonimowych celów statystycznych. Bez wezwania do sądu, dobrowolnego podporządkowania się dostawcy usług internetowych lub dodatkowych zapisów od strony trzeciej, informacje przechowywane lub pobierane wyłącznie w tym celu zwykle nie mogą być wykorzystywane do identyfikacji użytkownika.
Marketing
Przechowywanie lub dostęp techniczny jest wymagany do tworzenia profili użytkowników w celu wysyłania reklam lub śledzenia użytkownika na stronie internetowej lub na kilku stronach internetowych w podobnych celach marketingowych.